Wednesday, May 20, 2015

The Slug Trap Experiment

Slugs.
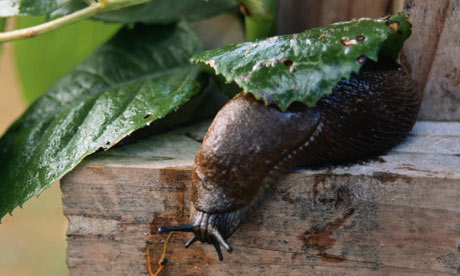
Everybody say "Ewwwww".
With seedlings everywhere it's a regular smorgasbord for the slimies and something needs to be done!

Slugs do have an important job to do. Without them (apparently) we'd be up to our elbows in the pooh of every living thing. Somehow though...the fact that slugs save us from mountains of shoite by eating it does little to endear them to me.
I still REALLY don't want them slithering over me dinner.

 http://static.guim.co.uk/sys-images/Lifeandhealth/Pix/pictures/2009/6/5/1244217361530/Garden-slug-hiding-under--001.jpg

This season, in my garden and in my allotment, I am concentrating on permaculture princples....one of which is to observe and interact with nature. I'm not sure that slug and slimey slaughter is what they they had in mind but too bad. The slugs have got to go.

So my first observation/experiment is to find out what is the best bait for my slug traps. Slug traps are very simple to make....just cut two little trap doors into a milk carton. Fill with a few inches of very tempting liquid. Fold the trapdoors in to make little diving boards and 'plant' the traps about three feet apart.
Yeah, you need a lot of traps.

And that brings me to my first issue.
The tradditional liquid to use in homemade slug traps is beer.


Years ago, when you could still enjoy a fag in pubs, you could get the contents of the driptrays from the landlord for free.

Now, pubs are more sophisticated (or without soul) and my husband  no longer frequents them.
So I am forced to buy booze for slugs and I can't help thinking there is a flaw in this plan.

It's not really cricket is it? To buy the chap a beer and then drown him in it.
It's also bloody expensive!

So how does the beer trap work exactly? that's what I need to know. What attracts the slugs to it? Because if it's the yeastie smell of beer, I can replicate that with some bakers dried yeast sachets or brewers yeast tablets for a fraction of the cost.


  And why do they drown instead of just slithering back out and staggering home with the hiccups?
Are they actually so pis... I mean too drunk to find the exit? If so, I've a sneaking suspicion the yeast won't do the trick.

So here is my first experiment.
One trap with lager in it.
An identical trap (well, bar the witty signage...) with this yeastie recipe in;
1 teaspoon dried yeast.
1 teaspoon sugar.
1 teaspoon flour.
couple of inches of warm water.

 Both traps side by side in a slug ridden raised bed.
Results to follow......

Monday, May 18, 2015

Cottage Garden Project...principle 1

 Permaculture principle one tells us to observe and interact with nature....
Well, the nature in my garden has trashed it.

The main flora in my garden is bindweed. It is more vigorous than anything else, it is a 'pioneer plant' and it really loves the edges and margins.
Fauna in my garden includes three large dogs, five marauding chickens, two kids and my husband (who mends his bikes there).


Permaculture teaches us to view the area as zones.
My garden looks like a war zone.


lattice fence and gate
 Now, I appreciate that every member of the family has their own priorities and uses the space in their own way. But the state of it was making me unhappy. So Wurzel built me this rather beautiful fence to section off the bottom third of the garden. We moved my little, rickety greenhouse down there. No dogs are allowed in 'my' bit. Chickens and children come strictly by invitation only.

 Behind the fence the war zone effect is gradually being replaced. I am taking my time and recycling everything that I can. 


'Pixie path' so named by Willow who helped mummy make it.

 For example,
The four foot high mound of broken up concrete, bricks and rubble in the back left corner?

I am using to build my paths and low retaining walls, stockpiling crocks for pot drainage and building a small rockery.

I had hoped to utilise some of the ancient chainlink fencing we found buried beneath the debris but Wurzel put his foot down.....so that lot went to the rag and bone man.

 I've started planting between the first path and the fence. In true cottage style there is a mixture of herbs, flowers and vegetables.


cottage planting with herbs, kale, onions and flowers.


There is so much work still to do. The bindweed grows faster than I can dig the roots.
 And there is junk to clear, rubble to use and weeds to pull.
I won't be using any chemicals. Just elbow grease and chicken power.....  


But when I'm tucked away in mummy's secret garden, with my little transister radio and a cup of coffee in my greenhouse, it's like the problems of the world don't exist.
Pure Bliss.

Friday, May 08, 2015

HOME MADE SEED TAPES

I've made some seed tapes.
An internet friend from a forum I visit has had great success growing parsnips this way....
So I'm copying him!
home made DIY seedtapes


I had started off my parsnip seeds on wet tissue paper, planting only the seeds that germinated, in the hope of getting a full row (for once in my life).
Sadly though, a grand total of THREE snips made it to the true leaf stage. 


Then I read how easy it is to make make seed tapes that hold the seed where it needs to be, hold the moisture and mean you don't have thin out seedlings.
All you do is place the seeds at the correct distances along a piece of masking tape, fold the tape in half (lengthwise) and plant it.
Can it really be that easy?

parsnip seedtape alongside garlic

I was concerned that the roots would not be able to escape the adhesive in the tape but I'm told it's no problem.
I mixed in some cornflowers and radishes with mine, then made  more tapes for carrots, leeks and flowers.
I started planting the tapes yesterday....I'll let you know how well they get on.

Yesterday also marked the second wave of seed sowing for tenders.

sowing sweetcorn in loo roll tubes

 I always sow sweetcorn in loo roll tubes so they get a good deep rootrun and so I can plant the whole thing to minimise root disturbance come transplant time. 
The top half of a milk carton makes an excellent funnel for pouring compost into the tubes.


And I received all these lovely seeds through the post.... 

seedswap goodies

 They were the result of a seed swap and I am thrilled with them! To have bought all these would have cost a small fortune and some, like Japanese Black Futsu squash, I had never even heard of!
What fun!
These seeds were all sown within an hour of arrival.

I am just loving the internet this week ;-)


Saturday, April 25, 2015

The Seedling dance.....

Hands up who's doing the seedling dance?
Every morning carting tray after tray of precious seedlings out to a sunny table....
And every evening rushing home to cart them all back in again before they catch a chill or, worse, get munched by the dreaded slimies? 


 My little greenhouse is already packed.
Wurzel and I cobbled together some 'make do' staging from bits and pieces. There is also the shelving from a blow away polythene greenhouse in there....but it's still not enough. 


It's not just seedlings.
A cyberfriend suggested putting 
some established strawberry 
plants in the greenhouse for an 
early crop.


One week later there are ten 
flowers open and countless buds.


More evidence of spring (if any were needed) comes from the hen coop 


The girls are back in lay....the elongated white eggs are from Racey Lacey, our little wyandotte bantam. She must be going on ten years old now and still giving us an egg or two a week in sunny weather.


And here is my apple tree, with beautiful blosom. 


Unfortunately this little tree is unlikely to produce fruit anytime soon. She flowers late and with no partner for cross pollination is destined to be purely ornamental for the forseeable future. My brother bought this tree for me. The variety is 'Queen Mary' and the apples are said to be aromatic and juicy, perfect for eating straight from the tree.

Maybe, one day, I'll get to taste one.

Monday, October 20, 2014

couch grass clearance


The cosmos is still really going for it but autumn has definitely arrived.....


Which means that it's time to get to grips with the couch grass.
Back in April, I did a bit of rough digging on the middle section of the plot. The ground was like concrete but I managed to break it up a bit. I chucked down some piles of well rotted horse manure and covered the whole section with black plastic. Then I cut holes in the plastic and planted through it squashes, courgettes, dwarf French beans, cucumbers, tomatoes and sweetpeas; all of which did really well and produced bumper crops.

Now the crops have been cleared and I can clearly see my trio of most tenacious weeds.


The docks and bindweed have
Dock sneaking out
taken advantage of any tiny gap in the plastic, even forcing themselves through the neckhole of a pop bottle. A part of me can't help to be impressed! Isn't it a shame they don't make good eating? The couch grass, though weakened where deprived of light, has redoubled it's efforts along the edges.

I will dig this area now and remove roots as I come across them; maybe border the edges with wood. I plan for this area to become 'no dig' beds in the future.
The docks grew like crazy where the plastic was split

No Dig systems sound so easy but the truth is that couch grass and bindweed will quickly overwhelm them, strangling plants both above and below the surface. The ground needs to be 'cleaned' of perennial weeds first.

Horseradish growing in pipe

In other news, the horseradish in the pipes seem to have taken well. Here at the stoney end of the plot I have planted my elephant garlic and some wallflowers this week. I will edge this bed with daffodil bulbs. Apparently, couch grass hates daffs! (Who knew? ) and won't encroach the bed past them. What's more, a host of bobbing daffodils to greet me will be a welcome sight on a cold February morning.


A less welcome sight is this poor dead rat. I hoped that a fox might come and remove it but no, looks like I'm going to have to overcome my squeamishness and move him myself. What does one do with dead vermin these days? Bury it? On a plot where you grow food? Insights and sage advice gratefully received!
Gorgeous globes

Friday, October 10, 2014

September End

As September came to an end I had a look around the plot.....


mint at the stony end of the plot.
The stony end.
This strip, at the southernmost end of the plot, is where generations of plotters before me have chucked all the stones as they were working the rest of the allotment. It is impossible to dig here with anything but a small hand fork. On the plus side this area is free draining and the stones retain the suns heat. I have decided, then, to make this my herb bed with a few self seeding annual flowers thrown in.
 
Horseradish
I love horseradish sauce. Seriously, I could eat it straight from the jar with a spoon. It's ridiculously easy to
Horseradish growing in pipe
grow....too easy in fact; horseradish is a real thug and will take over the whole herb bed if I let it. This year I'm trying an experiment. I have planted it in 2ft long lengths of pipe. This will hopefully mean that I get long, straight roots (which is the part you use to make the sauce) and will prevent the plants from spreading all over the place.
 
squashes, plastic and pop bottle.
 Squashes and pumpkins
I lost my vines to powdery mildew a few weeks ago. Planting through plastic (while waiting for the couch grass to die) makes it hard to water. I did 'plant' pop bottle funnels by each plant and I have plenty of good sized fruits. Unfortunately, they weren't quite ripe when the mildew struck and so how well they store remains to be seen.
 
globe artichoke year one
 
We've had a long old summer here in London.
September has been the driest on record with high temperatures and plenty of sunshine. I got off to a late start in the spring when I took on this new plot and so it follows that seeds sown late will flower late. As the plot should be winding down for winter, I am being treated instead to a spectacular show! The globe artichoke is more than 5ft high and has thrown out a dozen buds.
Also the cosmos, sown a little late, has waited until now to flower. These sweet peas just won't quit! I stopped picking (and watering) at the beginning of the month to allow seeds to develop for next year but they just won't stop flowering and the scent as you brush past is just amazing.
sweetpeas still flowering
 

Wednesday, October 01, 2014

Cucumber Pickles

 I harvested the last of the cucumbers and used two different recipes to make sweet pickles and sour dill pickles....
cucumber glut to be processed


The first recipe was this one for sweet dill pickles. I do these as slices and they are very popular with Little Flower who will pop a jar and eat the whole lot  while doing her homework....better than sweets I s'pose!
 
Little Flower's pickled Qs
 
250 ml white wine vinegar
salt
1 dessert spoon of mustard seed
1 dessert spoon  of dried dill
130 g ordinary white sugar
250 g sliced onions
450 g sliced cucumber.
 
Put the sliced onions and cucumbers in a bowl and layer with salt.
Leave for four to eight hours, rinse well, strain and turn out onto a clean tea towel to absorb any excess water.
Put all the other ingredients in a saucepan and bring to the boil.
Simmer for 5 minutes before adding the cucumber and onions....allow to come to the boil again and immediately spoon into hot, sterilised jars and seal with vinegar proof lids.
 
Leave for at least six weeks before scoffing.


My mum prefers sour pickles. They're not easy to find in the shops but I found this recipe online by the wonderful Delia Smith.
 
 
I left the onions out (mum doesn't like them) and I only had dried dill available but apart from that I stayed true to Delia's recipe.
Now I just have to wait THREE MONTHS to try them and tell you how they taste!
 
Dill pickles